How to clear the local DNS cache
This guide describes how to clear local DNS cache on different operating systems, namely Mac, Windows and Linux OS.
Mac OS
1. Open the Terminal.app, either by start typing Terminal on the Spotlight, or by going into Applications > go to Utilities > click Terminal

2. Run one of the following commands depending on the version of OS X you’re using and press Enter, then type your user password when prompted:
OS X Yosemite:
sudo discoveryutil mdnsflushcache

OS X Mavericks, Mountain Lion, and Lion:
sudo killall -HUP mDNSResponder

Mac OS X v10.6:
sudo dscacheutil -flushcache

Windows OS
Below you can find instructions on how to clear local DNS cache on different versions of Windows OS.
Windows XP:
1. Click on Start button ![]()
2. Choose All Programs > click Accessories > click on Command Prompt
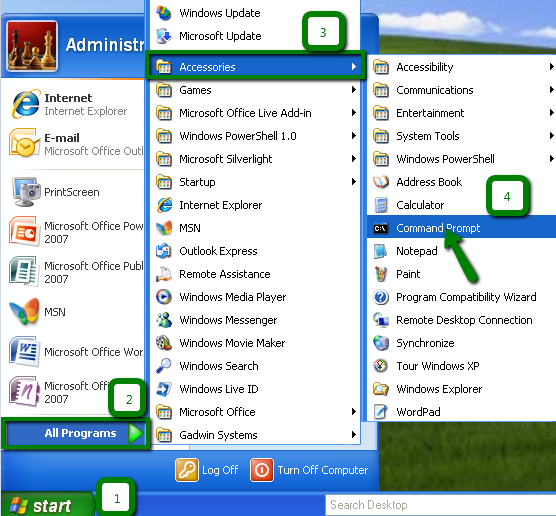
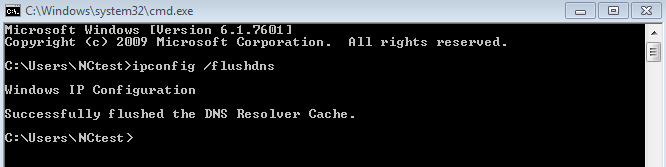
3. In the Command Prompt window type in ipconfig /flushdns and press Enter:

4. You will see the following confirmation message:
Successfully flushed the DNS Resolver Cache
Windows 7 or Vista:
1. Click on Start button ![]()
2. Click All Programs > Accessories > right-click on Command Prompt and choose Run as Administrator.
3. In the Command Prompt window type in ipconfig /flushdns and press Enter
4. Once done, you will see the following message:
Successfully flushed the DNS Resolver Cache
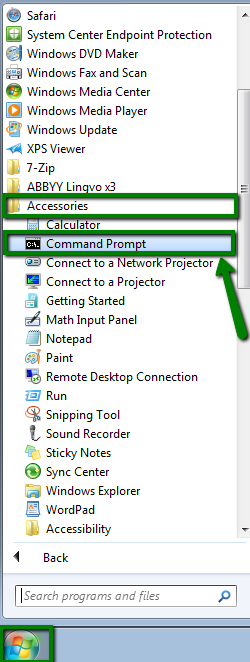
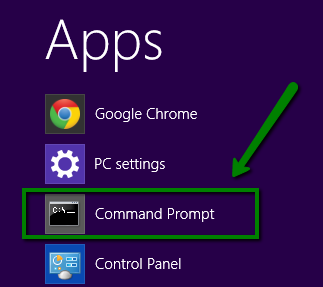
Windows 8 or 8.1:
Flush DNS command on Windows 8 and 8.1 is the same as on Windows 7 and Vista, the difference is only in how to open the command prompt.
1. Press the Start button ![]() > Applications > type ‘Command prompt’ in search bar
> Applications > type ‘Command prompt’ in search bar
2. In the Command Prompt window type in ipconfig /flushdns and press Enter
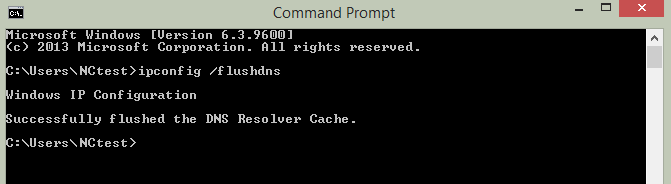
3. After the cache is cleared you will get the following message:
Successfully flushed the DNS Resolver Cache
Linux OS
One of the most commonly used DNS caching Linux applications is NSCD (Name Service Cachine Daemon). If you have NSCD installed, you can clear the local DNS cache by running one of the following commands in your favorite terminal/shell application:
sudo /etc/init.d/dns-clean start
sudo /etc/init.d/nscd restart

This is it!
Need any help? Contact our HelpDesk